Making Quiz with Autoproctor | Making quiz with Timer and Proctor
Adding Timer + Proctor in Google Forms
This post will give you detailed information about adding a Timer and a Proctor in the google forms quiz.
🤔First of all, what is Timer + Proctor?
Timer and Procter is an extension used in google forms for making quizzes. It helps to set a time limit and some protection measures that the player doesn't cheat during the quiz.
🤔Is Timer + Procter free of cost and easy to use?
Yes, the extension is free of cost and easy to use.
🤔How to use Timer + Proctor in google forms?
Steps to use Timer + Proctor in google forms are given below, just follow these simple steps to make a quiz just the same as you want to make.
Step 1: Open the google form page that you have created. Click on the three dots ( ፧ ), then click the add-ons button.
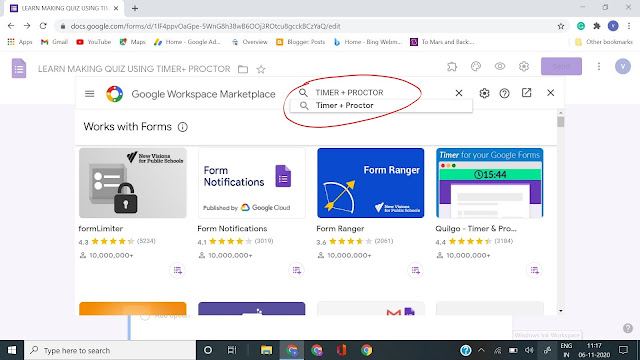
Step 2: Following window will appear. Click on the search box.
Step 3: Write Timer + Proctor in the box.
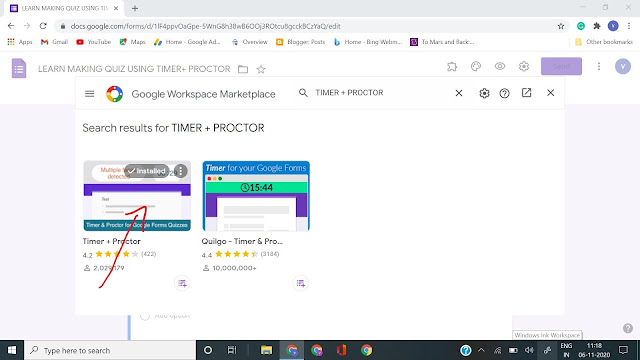
Step 4: Click on Timer + Proctor.
Step 5: Install the extension ( Timer + Proctor ).
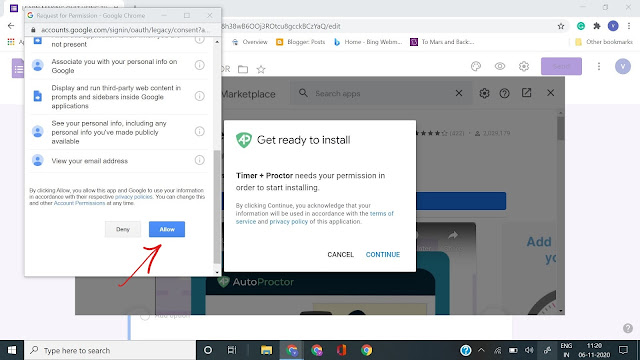
Step 6: Click on Continue. A new window will appear.
Step 7: Click Allow to continue.
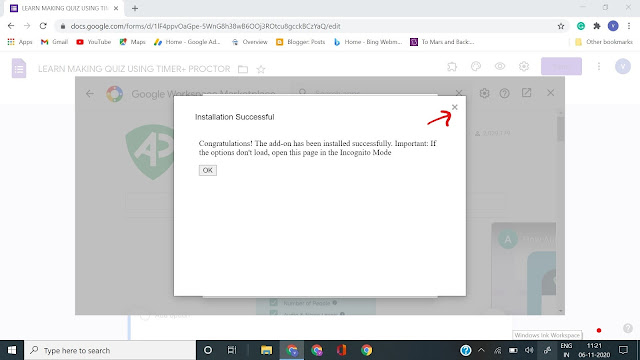
Step 9: Click Done.
Step 10: Close the Google workspace marketplace window.
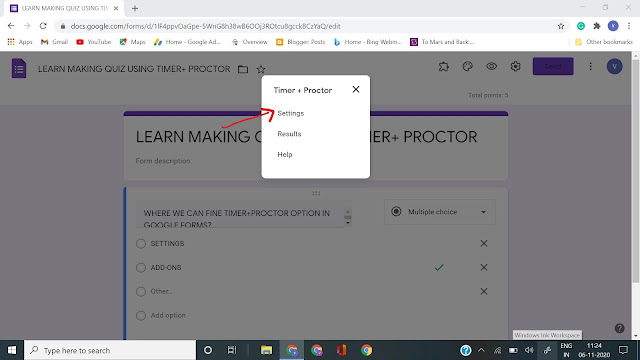
Step 11: Click on the add-ons button then click the timer + proctor button.
Step 12: The following options will appear. (If these options don't appear then reload the page.)* After that click on settings.
Step 13: A new window will appear. Click on the Timer option. Make sure that you have enabled the timer.
Step 14: The following options will appear where you can set a start date, time, and end date, time for the test. You may click on the info button to know more about the options. After adding timer settings click on the update button.
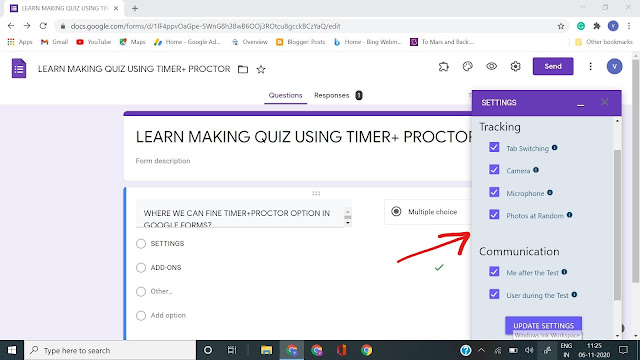
Step 15: Click on the Proctor button. The following options will appear. After adding the Proctor settings click the update settings button.
Step 17: Your Quiz is ready to share. Share it with whom you want to.
Step 18: After the Quiz is over, open the google form page and click on add-ons options. Then click Results options. You may see all the results there.
You have successfully made the quiz using Timer + Proctor!
You may also share this video with students so that they will be able to give the test without any technical issues.👇
Video link:- https://youtu.be/LoAqvp5rkEM
If you need more "how to" articles like this please comment below.










Comments
Post a Comment
Thank you for your comment.